
Spectrometer and StellarPro-TFC Installation
- Navigate to the downloads folder and right click on ‘StellarPro-TFC_Setup.exe’ and choose “Run as administrator”.
- Next a window may pop up warning that Windows did not recognize the publisher.

- Choose More info and then click on Run Anyway

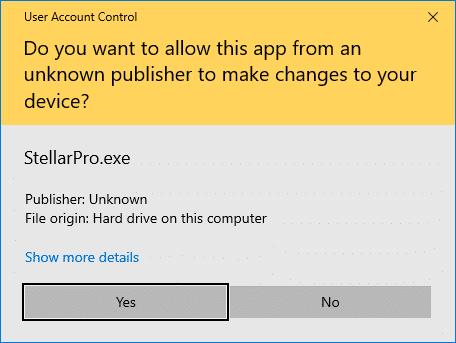
- Next, a yellow User Account Control Windows prompt may appear asking permission to run the program; choose yes.
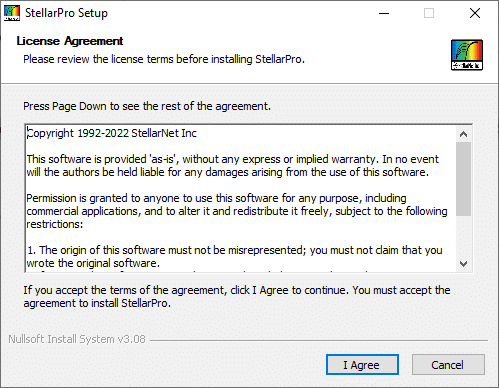
- The License Agreement will appear next. Read the agreement and choose “I Agree” to continue.
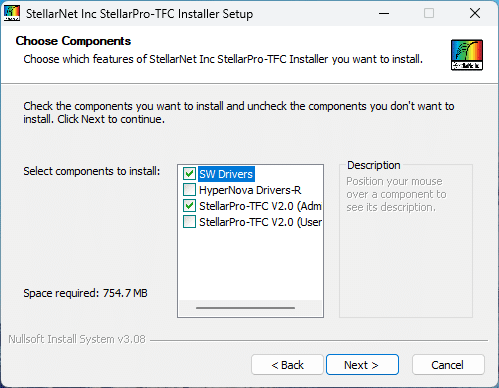
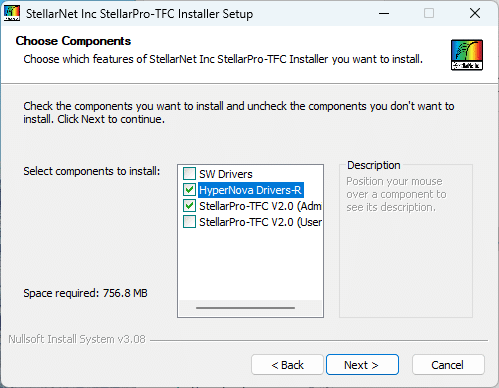
- A window will appear allowing you to choose which components will be installed:
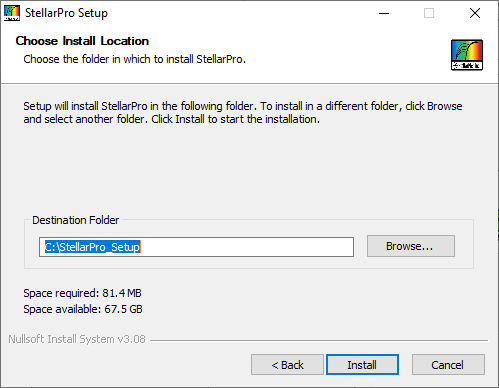
- The next stage will allow you to select which folder the program will be installed in. We recommend that you stick with the default location and choose “Install”
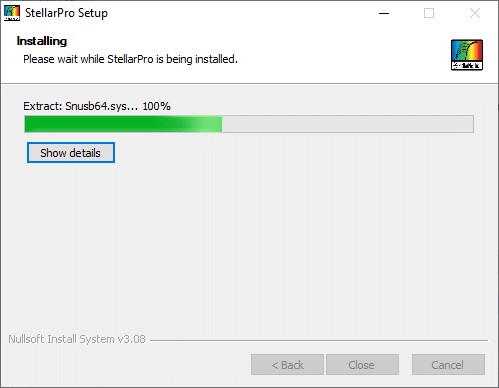
- The program’s green progress bar will move towards the right until complete.
- A warning message may appear, click okay and continue. Do not worry about this message. Click okay and move on to the next step.

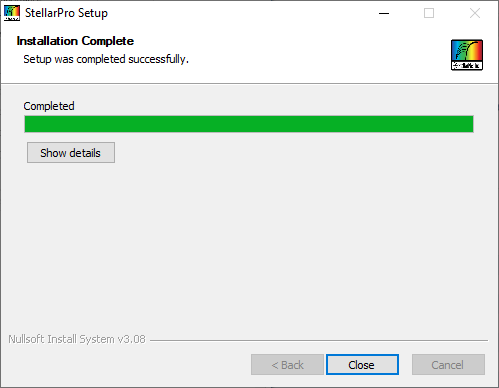
- When the process has completed, choose “Close”.
- Congratulations! You have installed the selected components installed. On your desktop, you will see the installed software StellarPro-TFC
 .
. - Now, plug in the spectrometer through USB. You should see the green LED light up on your spectrometer!
- Right click on StellarPro-TFC and choose Run as administrator.
- Windows UAC will ask to allow the program to make changes to your computer. Choose “Yes”.
- A StellarNet, Inc. splash-screen will appear with file locations flashing in the upper right-hand corner. It can take some time for the program to load, so be patient.

- Eventually, a License screen will appear when you use the StellarPro-TFC. (If your computer has undergone a major update, a new license might be required). Transcribe the green code into an email to Support@StellarNet.us and copy your StellarNet technical sales representative. You will need this code to request a license key to activate this software package. If you can, include a copy of your paid invoice and a picture of the bottom of your spectrometer to help expedite the process.
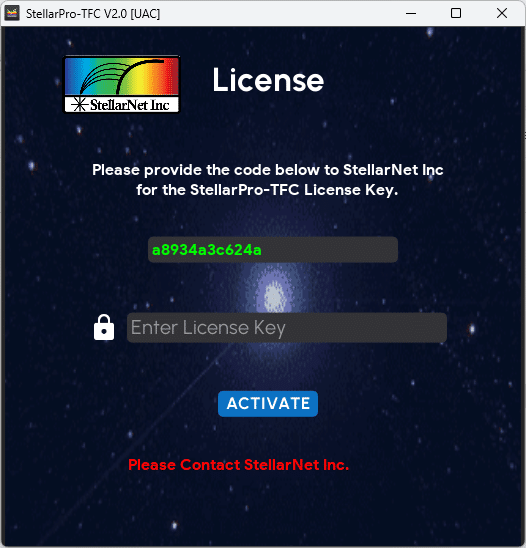
- Once StellarNet has provided a license key, save this key somewhere safe and paste it into the “Enter License Key” field. Note that each computer you use will require its own unique license key. Choose “ACTIVATE” once the key has been entered.
- Now, you are ready to use the StellarPro-TFC! Visit Log In or Create an Administrator Account for the next section.
Please reach out to Support@StellarNet.us if you need any assistance with installing the driver and the software!