Transmission – StellarPro Quick Start
- Turn on the computer. Open the StellarNet software by double clicking on the desktop icon StellarPro
 to open the application.
- When you first open the software, you should see a screen that looks like:

- Turn your light source on and have no sample on the fixture. Select the Scope tab in the Graph window.
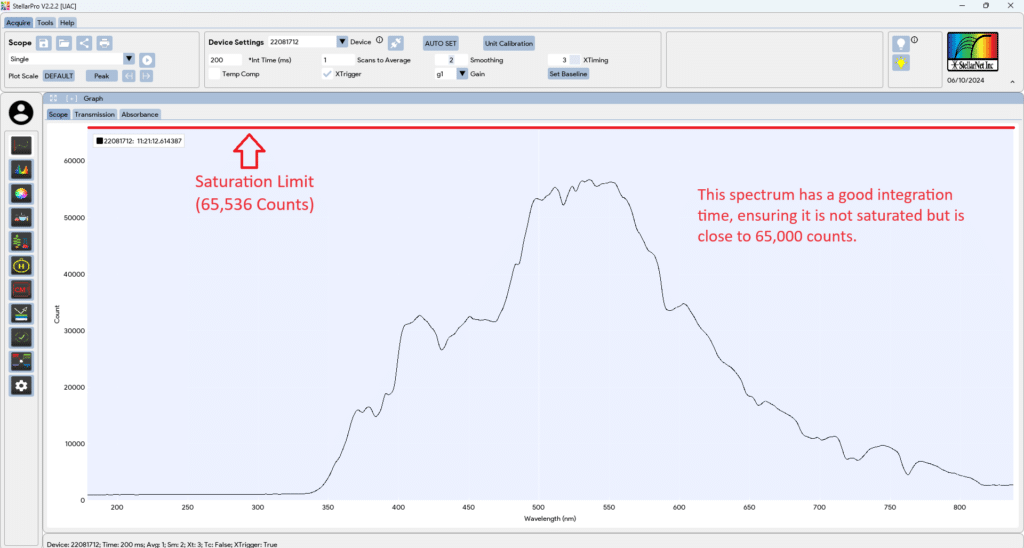
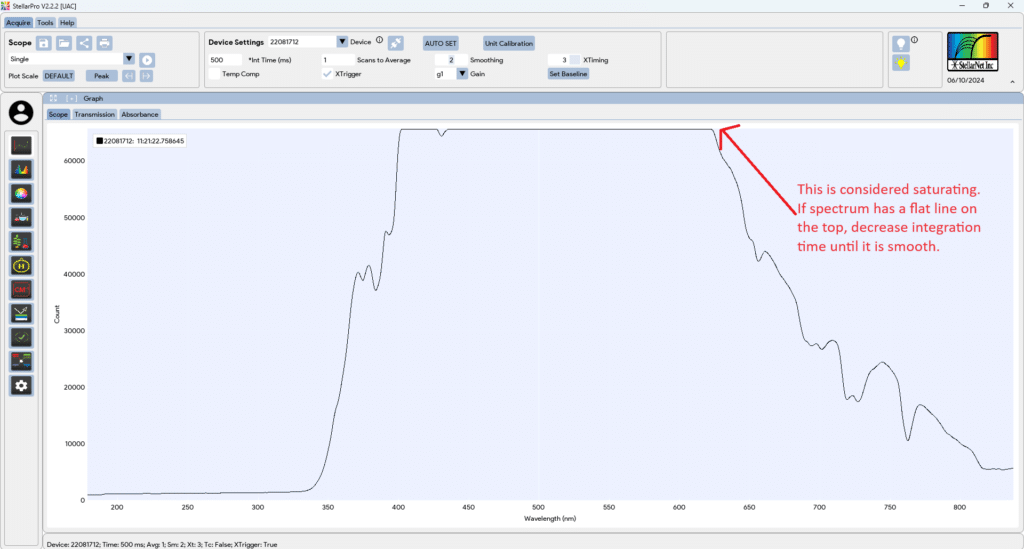
- Set the integration time so that your spectrum is not saturated but as close to 65,000 counts as possible. Enter the desired time in the integration time input box, then click on the “Int Time (ms)” button next to the input textbox to apply the entered time. The goal is to maximize your signal in SCOPE mode. You want to adjust your integration time until the spectrum fills most of the SCOPE graph (65,000) without saturating. This is also the point at which you should adjust the number of scans to average (more scans averaged will increase accuracy, but will take more time for each reading). You can also add smoothing controls at this time in the Device Settings block. A pixel box car set to 3 and averaging set to 5 often gives nice results.
- In the first picture below, the spectrum is correctly optimized to be just below the saturation limit (65,536 counts).
- In the second picture below, the spectrum have a flat line on the top, indicating the need to reduce the integration time.
|
- After optimizing your conditions, turn off or block the light source from the spectrometer. You should see the baseline is flat, but slightly above the zero value. You may also see some peaks from overhead lighting. Left click the Dark Reference button to take a dark. You should see the baseline drop to zero.
- Turn your light source back on. You should see that the spectrum is now flush against the x-axis. With no sample in place left click on the Blank / Light Reference button and this is your reference measurement (100% transmission)
- Now you can navigate to Transmission tab in the Graph window. With no sample in place you should see your transmission/reflectance line to be fairly flat at 100%. Note that %Reflectance and %Transmission are mathematically equivalent.
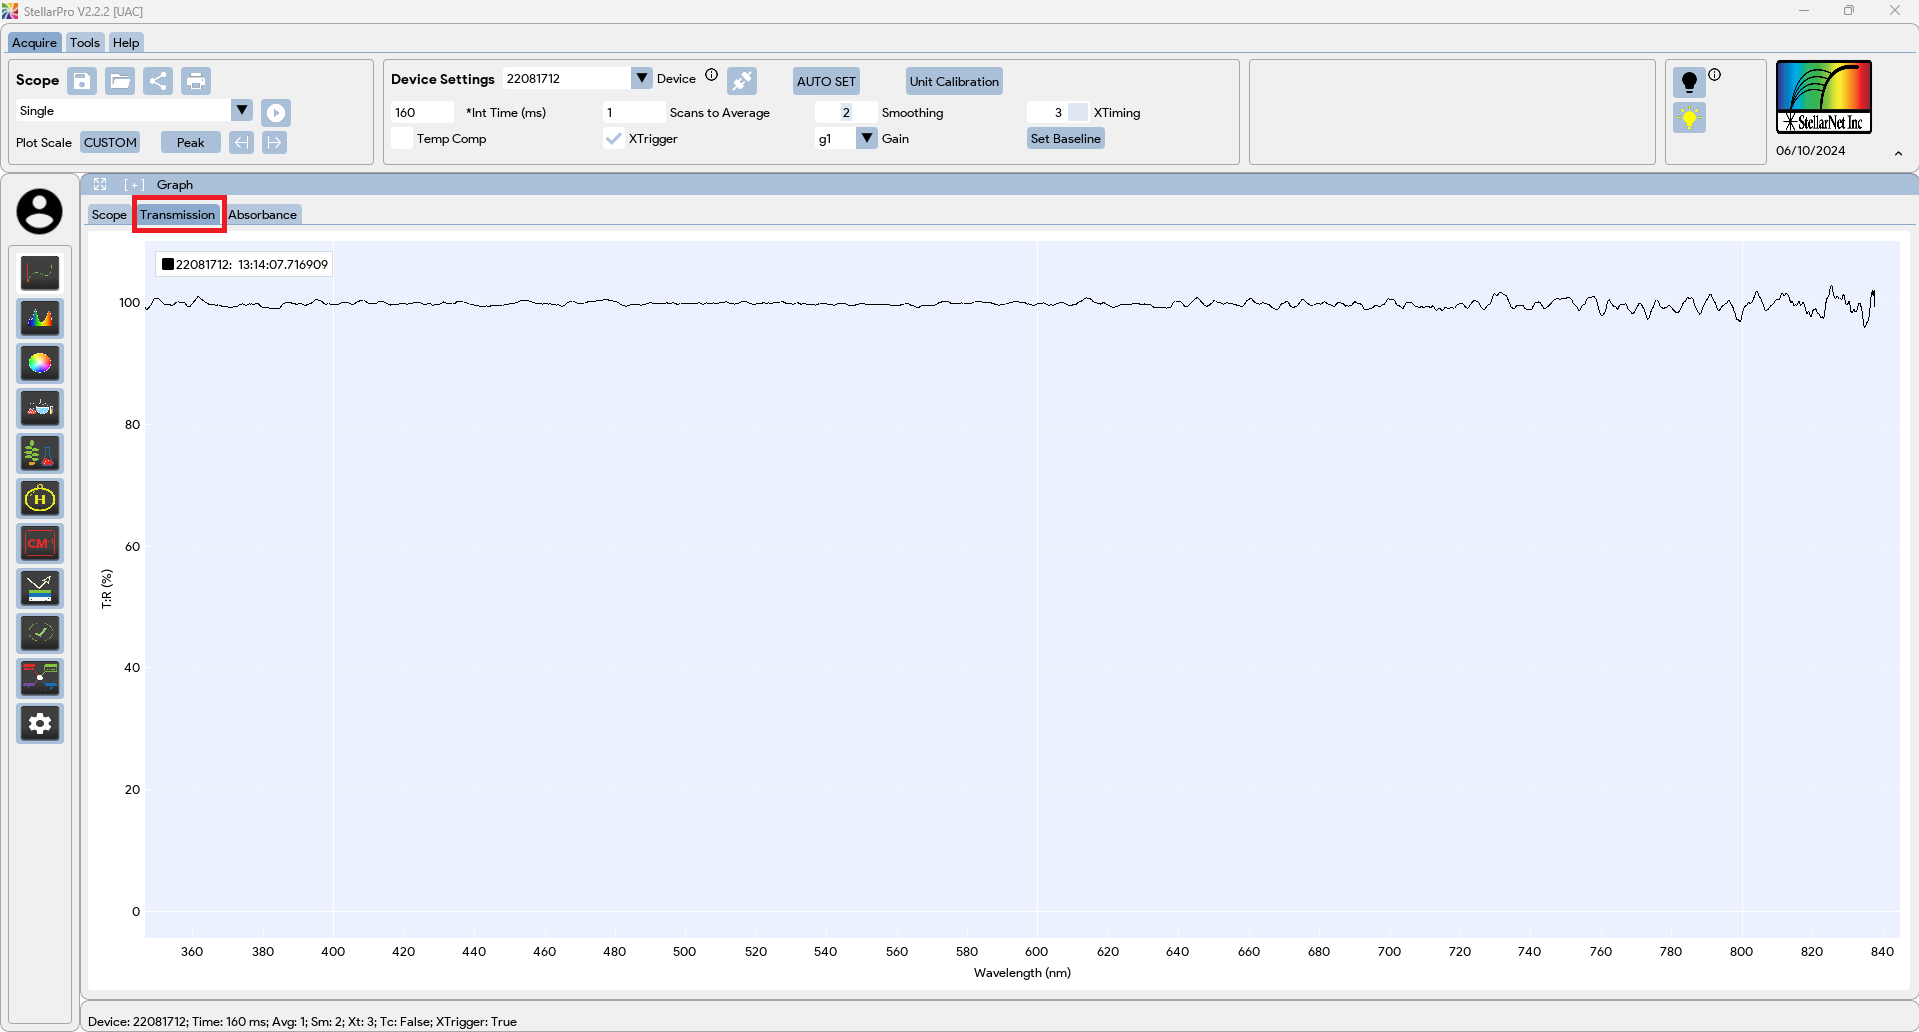
- Place your sample below the probe holder and you should see your reflectance curve.
- To open the color application, go to Application Modes on the side navigation bar, select
 and you will be directed to the Colorimeter Application page. Click the Capture button
  to see the graphs updated on this application page.
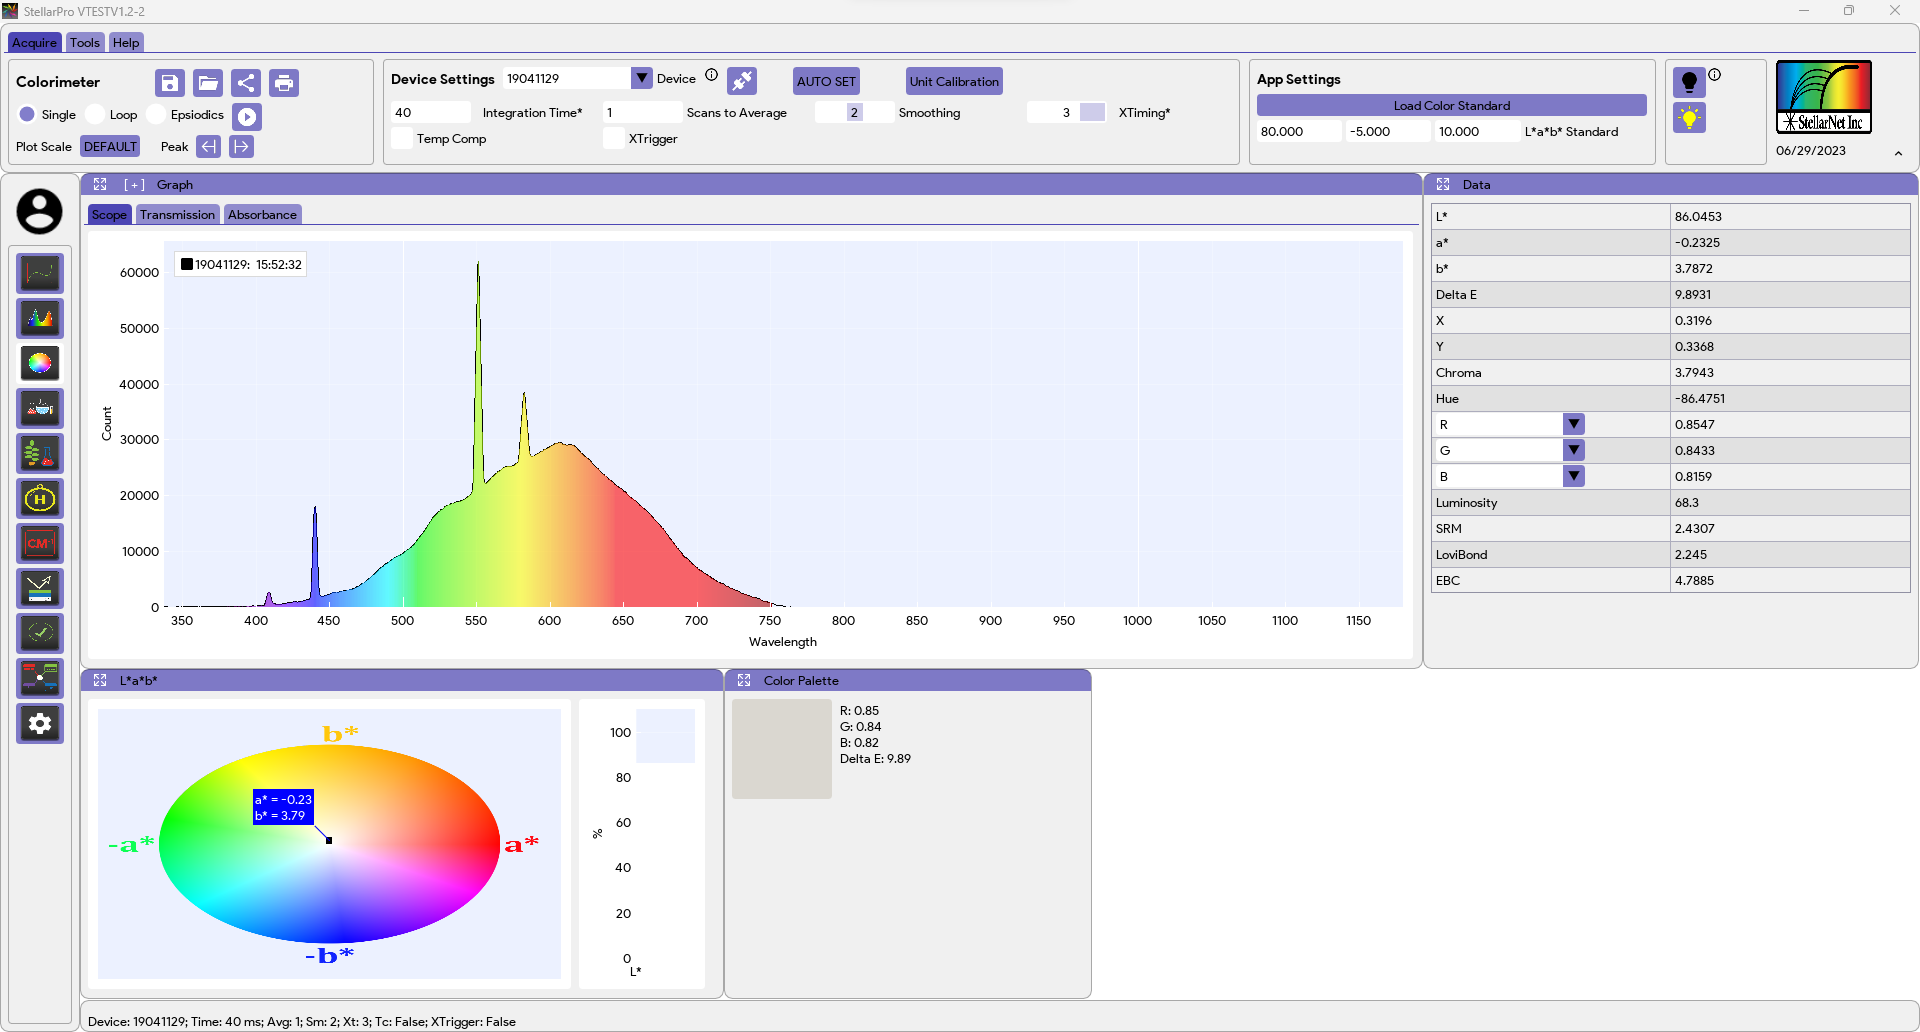
- Save your sample by clicking the floppy disk icon
 above the capture options.
- Your saved file will be a .TRM. This is a simple text file and can be opened in virtually any program.
Tags: Application, Software
 to open the application.


 and you will be directed to the Colorimeter Application page. Click the Capture button
  to see the graphs updated on this application page.
 above the capture options.