
This tutorial is intended for StellarNet customers wishing to use their calibrated spectrometer for radiometry. If you have any questions or comments, please contact Support@StellarNet.US
1. Make sure SpectraWiz has been installed and functions properly.
a. If you have not yet installed SpectraWiz, please visit WWW.StellarNet.US/Download for detailed instructions and the necessary files
2. Radiometry requires a calibration file to be loaded in SpectraWiz. Each physical configuration should have a unique radiometry calibration. Annual re-calibration is recommended to validate proper function of the instrument.
3. If your instrument was calibrated for radiometry, the file will be shipped on a form of removable media (CD, thumb-drive, etc.) along with the instrument.
4. Insert the removable media
5. Browse to the location of the removable media
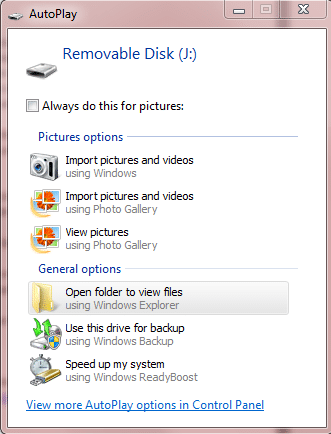
6. If your system has been calibrated, there will be a self-executing zip file called MyCALxxxxxxxx.exe
a. The xxxxxxxx will correspond to the spectrometer’s serial number and the calibration type
7. Right click on the MyCAL file and choose “Run as administrator”

8. Now choose “Unzip”

a. Files will unzip to the SWCals folder in the SpectraWiz directory

9. Now open SpectraWiz
a. If this is your first time running SpectraWiz or you have never opened SpectraWiz as administrator, please right click on the SpectraWiz icon and choose “Run as administrator”
10. To load a calibration, click Applications>Radiometer Calibration
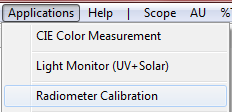
a. You will be offered 3 options:
i. Yes – Loads a calibration
ii. No – Saves calibration to file in .CAL format
iii. Cancel – Begins process of calibration. For further information on this option, see the Calibration Tutorial on the Download page.
11. Choose “Yes” to load your calibration file.
12. Click on the SCOPE Mode icon

13. Release the dark reference by right clicking on the dark lightbulb icon ![]()
14. Make sure that Average Dark Spectrum is unchecked
a. Setup>Spectral smoothing controls>Average dark baseline
15. Optimize your curve
a. The first goal is to increase integration time so that the amplitude of the curve reaches ¾ to 90% of the maximum (65536 counts).
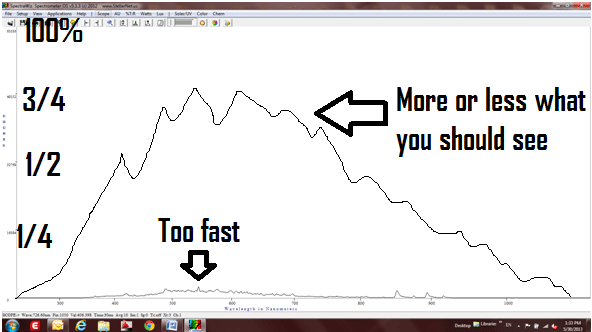
i. To adjust integration time you can use the clock icon or click Setup>Detector integration time

ii. Longer integration times collect more photons. Shorter integration times collect less photons.
iii. Be careful not to saturate the detector with photons! If you saturate, try a shorter integration time. We recommend keeping radiometric measurements between 30ms and 3000ms.
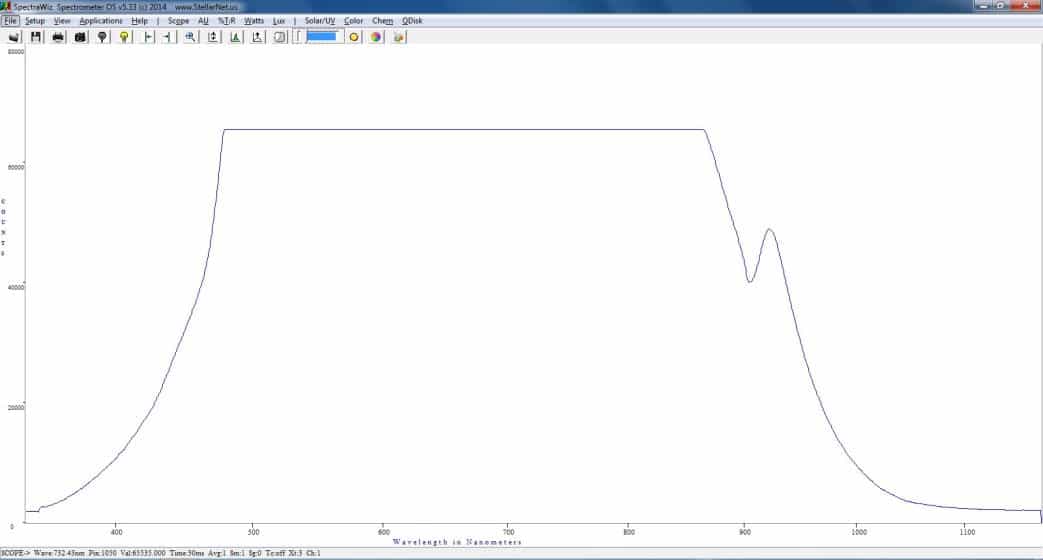
The above picture is of a saturated curve.
b. Adjust Pixel boxcar smoothing controls
i. Pixel boxcar can be set from 0-4
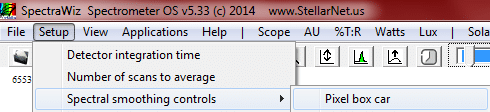
ii. Once the value for this setting has been chosen, there is no need to re-visit unless a new setting is desired
c. Adjust number of scans to average
i. Scan averaging is useful in stabilizing a measurement. Note that averaging scans will increase wait time. Multiply the number of averaged scans by the
integration time to determine wait time.
16. Now that the curve is optimized, cover your light collecting accessory (sphere, cosine receptor, etc.) so that there is zero light detected by the spectrometer. If you are using a sphere with an internally mounted light source, turn off the lamp or remove the SMA fiber from the spectrometer and block the spectrometer’s SMA port.
17. Left click on the Dark reference icon to take a dark reference ![]()
a. A left click will take a dark reference of whatever is viewed on screen.
b. A right click will release the dark reference.
18. Uncover the light collecting accessory (or turn on your lamp/ insert the fiber if lamp is internally mounted in a sphere)
19. View the spectrum on-screen. If it looks correct, we can switch to Radiometer Mode
20. There are two approaches to switching to Radiometer Mode
a. Click on the Watts or Lux buttons at the top of SpectraWiz’s icon bar

b. Click View>Radiometer and choose the desired mode
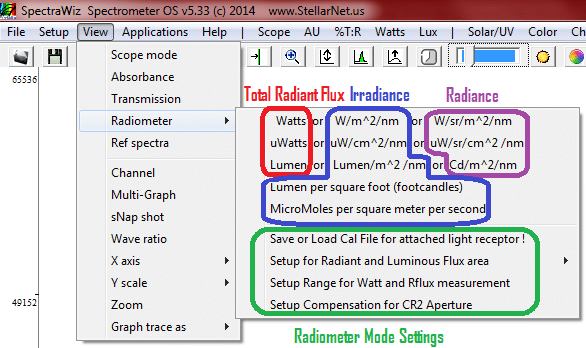
c. The calibration type dictates if the measurement is Total Radiant Flux, Irradiance or Radiance.
21. Now we are in a radiometric mode.
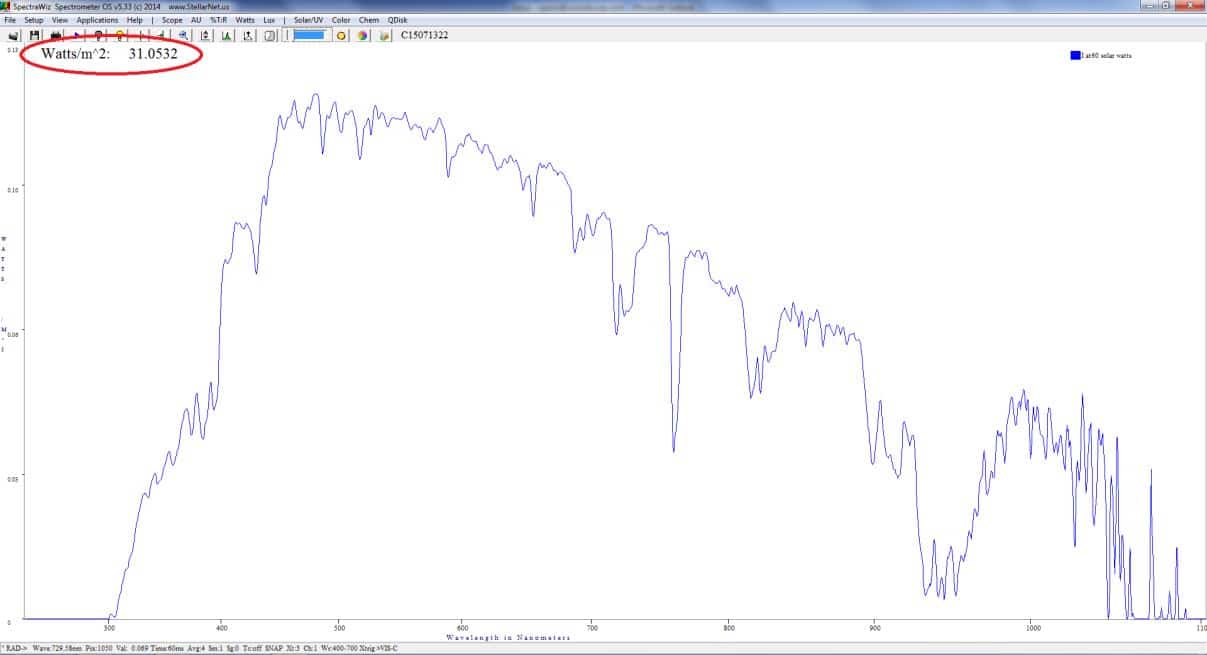
a. Notice that the top left corner has a value in units corresponding to your calibration type.
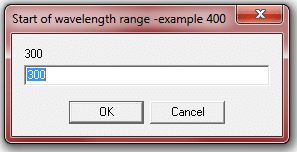
b. This value in the corner is calculated from the area under the curve over a specific range. To change the range choose View>Radiometer>Setup Range for Watt and Rflux measurement
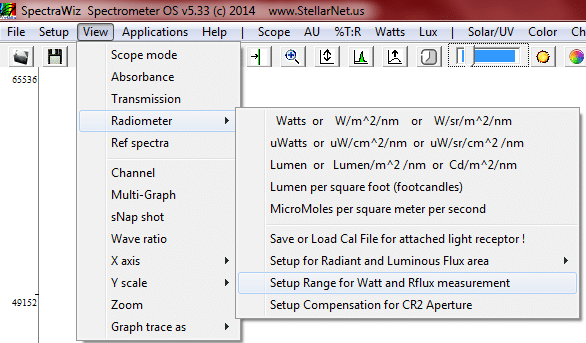
i. Choose your start wavelength first, click OK, and then your end wavelength and click OK
ii. Note* photometric modes (Lumens, Lux, etc) have predefined ranges because they are based on the response of the human eye.
For Dual Calibrated Systems
1. Uncheck the View>Multi-Graph option so that only one channel displays.
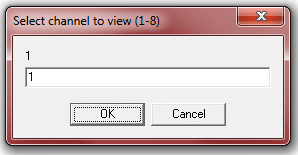
2. View Channel 1
a. 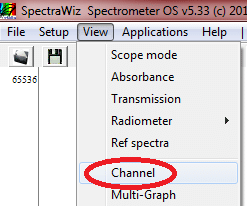
b. Type 1 and click OK
3. Load the calibration file for channel 1 using methods outlined in steps 10&11
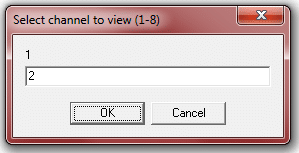
4. View Channel 2
a.
b. Type 2 and click OK
5. Load the calibration file for channel 2 using methods outlined in steps 10&11
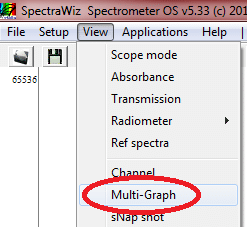
6. Check Multi-Graph to view both channels
7. Note that both spectrometers have independent integration times