LED Measurement – SpectraWiz Quick Start
- Turn on the computer. Open the StellarNet software by double clicking on the desktop icon SpectraWiz to open the application.
- When you first open the software, you should see a screen similar to the one below:
- Turn on your LED or device to be tested.
- Click on the Scope icon. This will show you the raw signal. You should see a spectrum of counts versus wavelength.
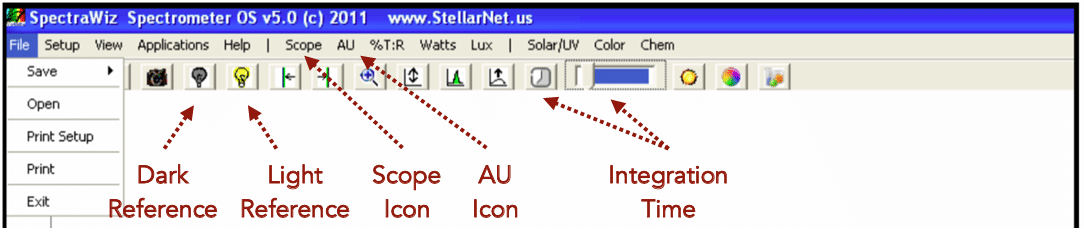
- Turn your light source on and have no sample on the fixture. Set the integration time so that your spectrum, in the SCOPE mode, is not saturated but as close to 65,000 counts as possible. Click on the integration time icon
 (and type in a value between 1 and 1000 ms) or use sliding scale
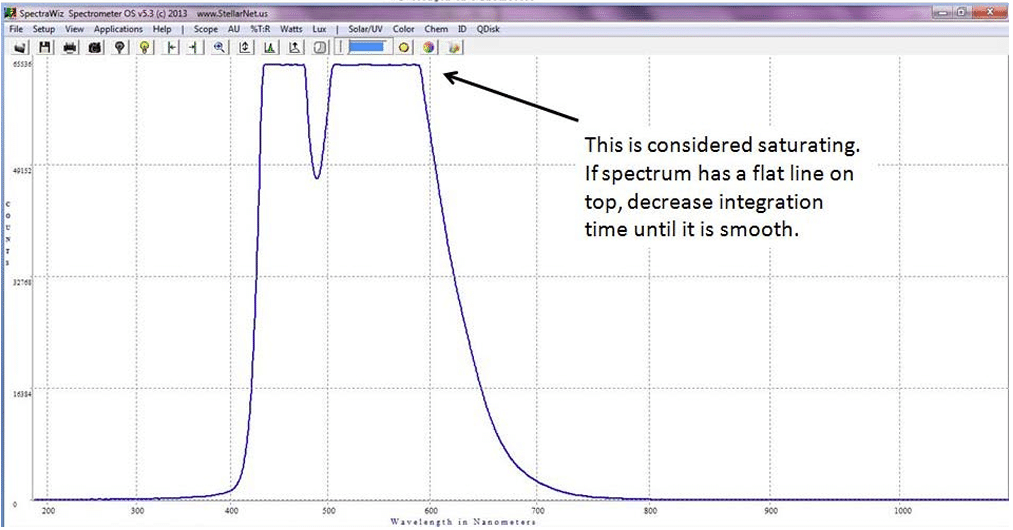
  . In the first picture below, the spectrum is correctly optimized to be right below the saturation limit (65,536 counts). If a portion of the spectrum is off the screen reduce the integration time. The goal is to maximize your signal in SCOPE mode. You want to adjust your integration time until the spectrum fills most of the SCOPE graph (65,000) without saturating. This is also the time at which you should adjust the number of scans to average (more scans averaged will increase accuracy, but will take more time for each reading). You can also add smoothing controls at the time too in the setup tab. A pixel box car set to 3 and averaging set to 5 often gives nice results.
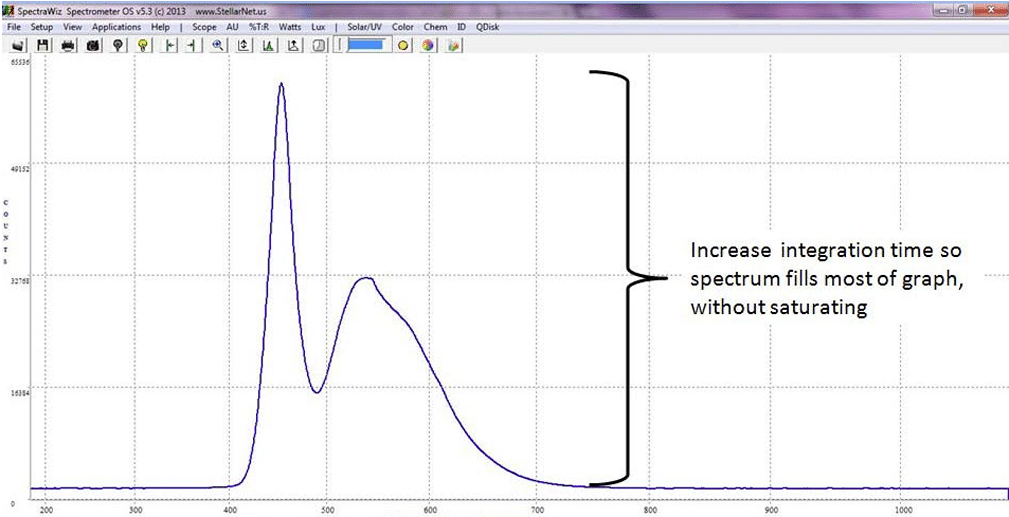
- Now, cover or turn off your LED. Wait several collection cycles and hit the dark light bulb icon
 in the toolbar at the top of the screen. You will see your baseline drop to zero.
- Click on Watts mode to see your LEDs spectral curve and power output. Click CIE Color Measurement icon
 or from the Applications Menu to see colorimetric values.
| Warning: If your system saturates at all integration times or you need to reduce your exposure time <15ms to get a signal, then you must use a CR2-Aperture (CR2-AP) or inline neutral density filter to reduce light intensity to your system’s detector. There are other possible solutions as well. Please contact a StellarNet technical sales associate to choose which solution is best for your application. For Radiometric applications it is recommended to use exposure times >15ms. |
Tags: Application, Software