Get To Know The Hardware
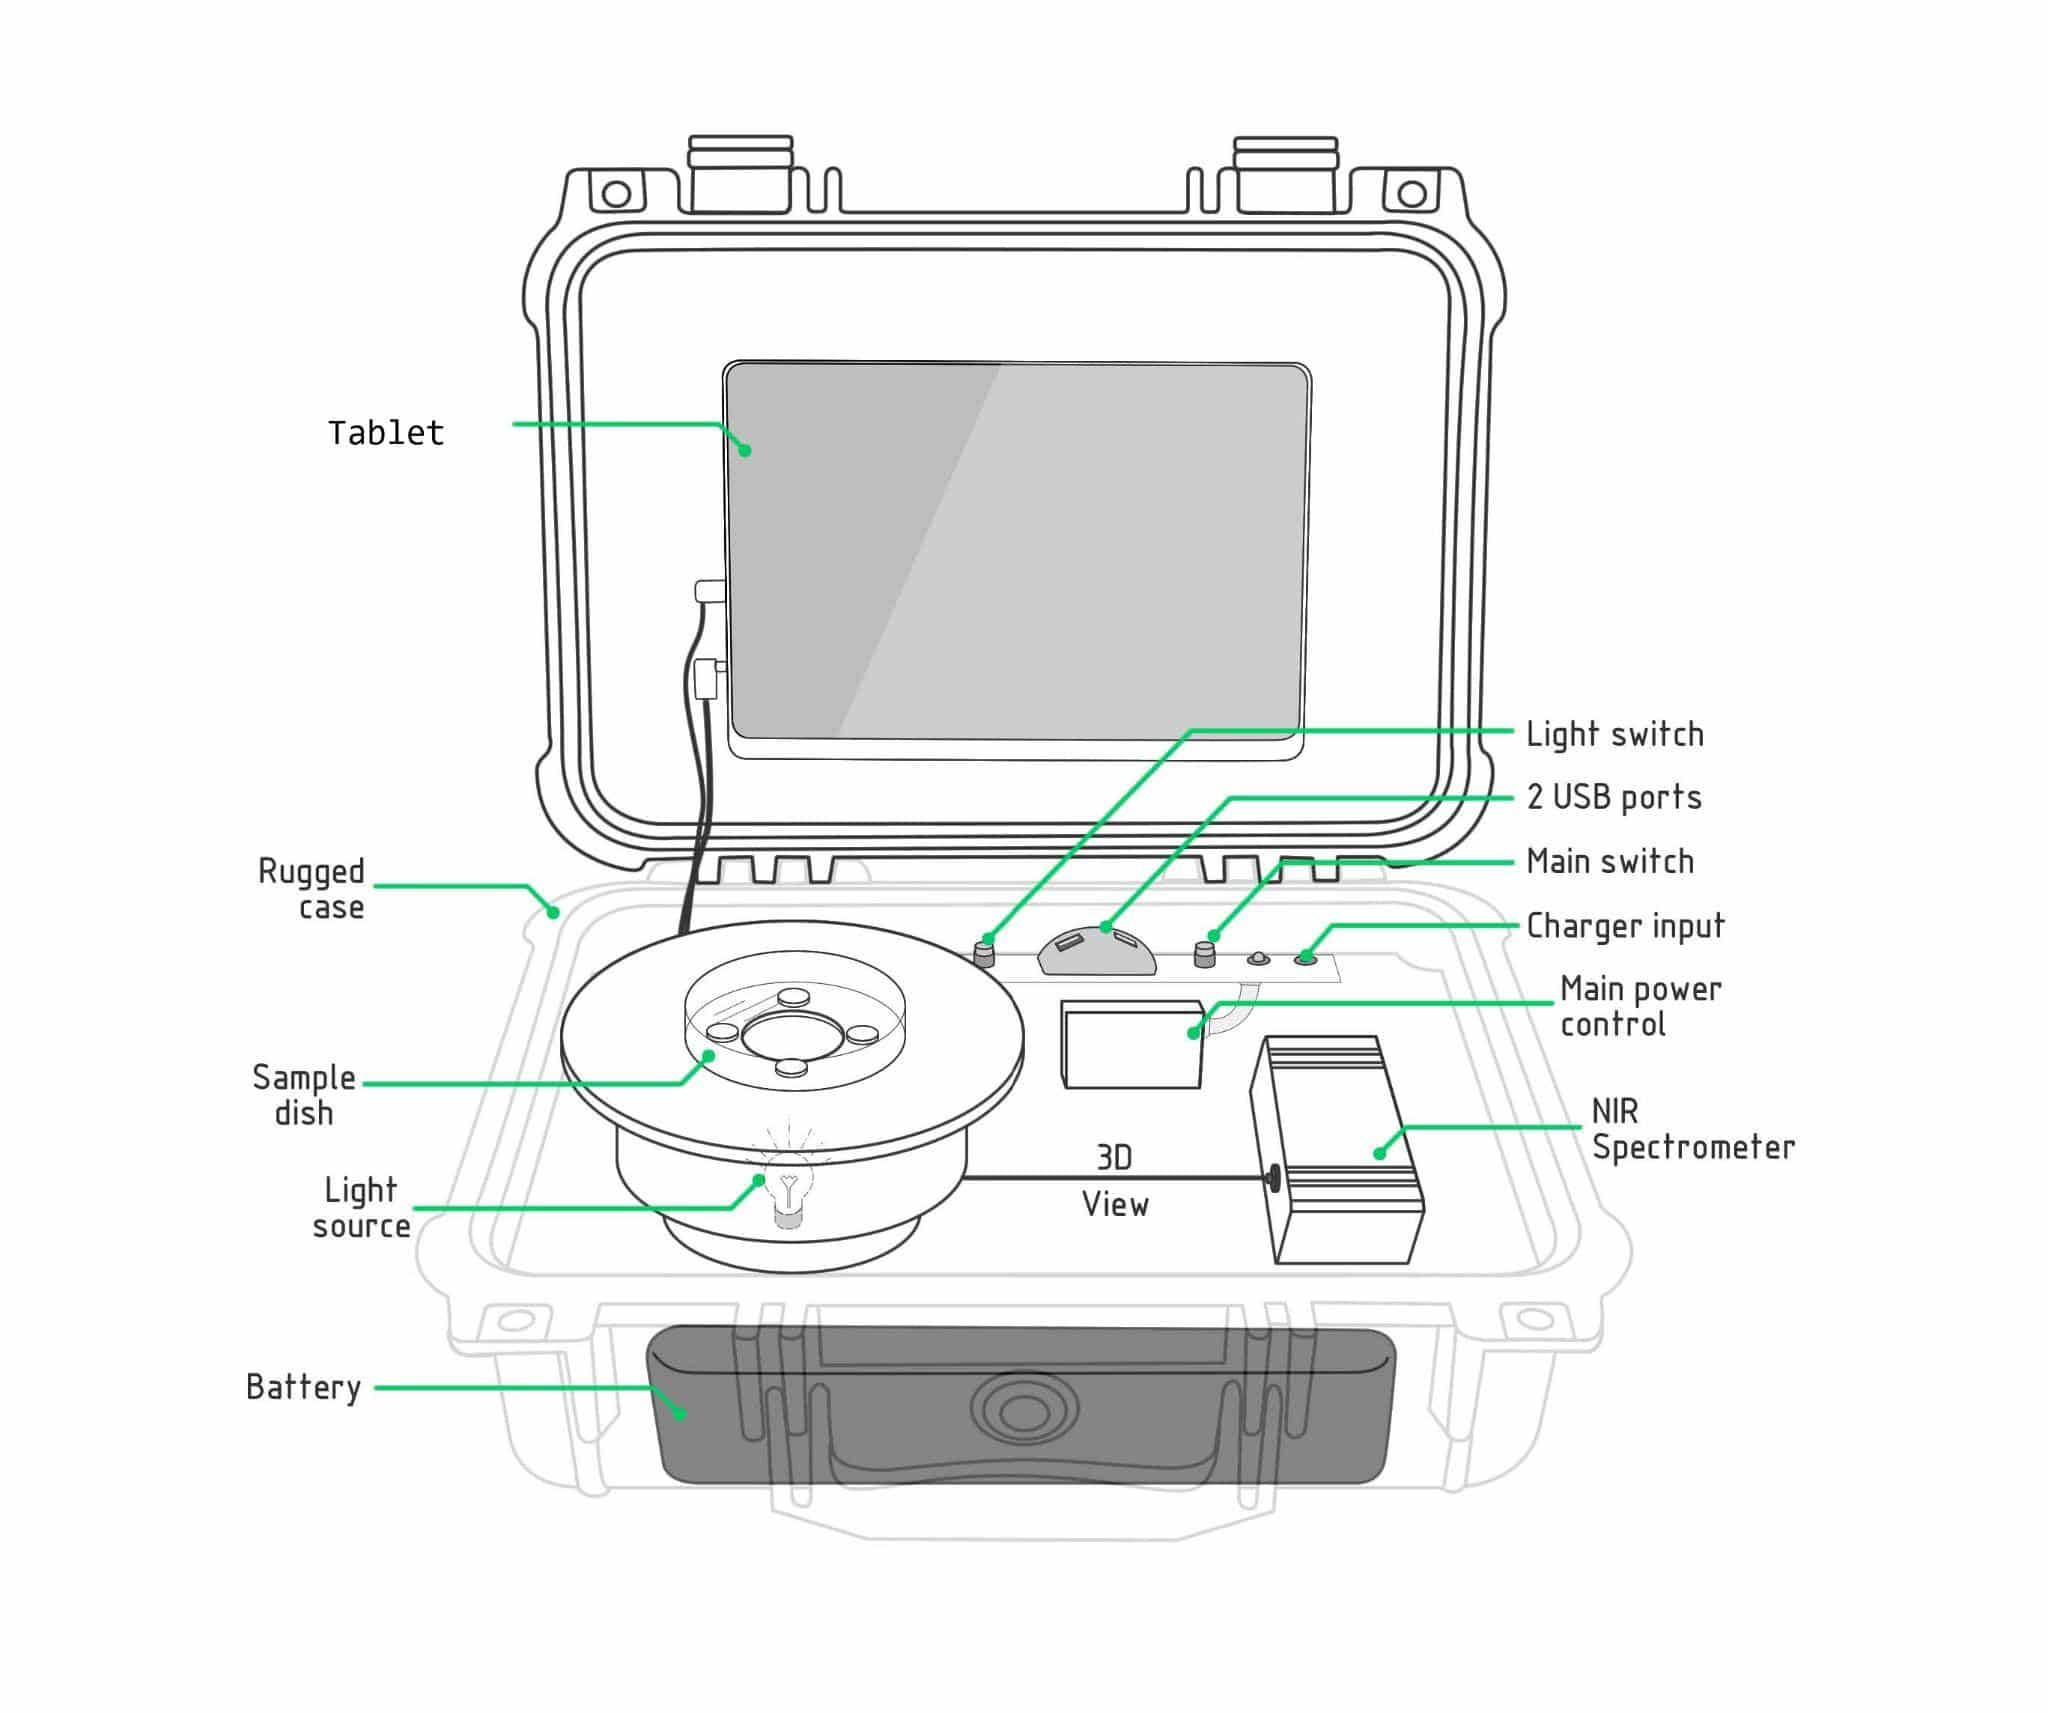
Specifications:
Spectrometer Range: 900-1700nm
Optical Resolution: 2.5nm
Detector Type: InGaAs Photodiode Array
Reflectance Source: Tungsten Halogen
Optical Measurement: 3D reflectance fixture
Battery: Lithium Ion
Lamp Power In: 350 mA @ 12VDC
Dimensions: 6 x 11 x 13”
Measurement Speed: Typical – 1-5 seconds
Get To Know The Software
The ChemWiz-ADK-CASE is preloaded with our StellarPro software. This quick start guide will cover the procedure for taking a measurement and creating the predictor. Visit the StellarPro ChemWiz-ADK App to become familiar with the ChemWiz-ADK interface.
Taking a Measurement Procedure
- To begin taking a predictor, open the StellarPro software
 .
. - When you first open the software, you should see a screen similar to the one below:

- For the ChemWiz-ADK application, navigate to the ChemWiz-ADK app in the application modes
 .
. - Check the acquisition type in the top left window and confirm it is set to “Single” – you can use loop too, but while taking your reference measurements single shot is suggested.
- Place the RS50 standard on top of the fixture. If samples are to be placed in a Pyrex or other glass dish, place the RS50 standard in the glass dish.
- In the Graph window, click on the Scope tab to display the scope graph, then press the ‘Capture‘ button
 to take the spectrum of the RS50 standard.
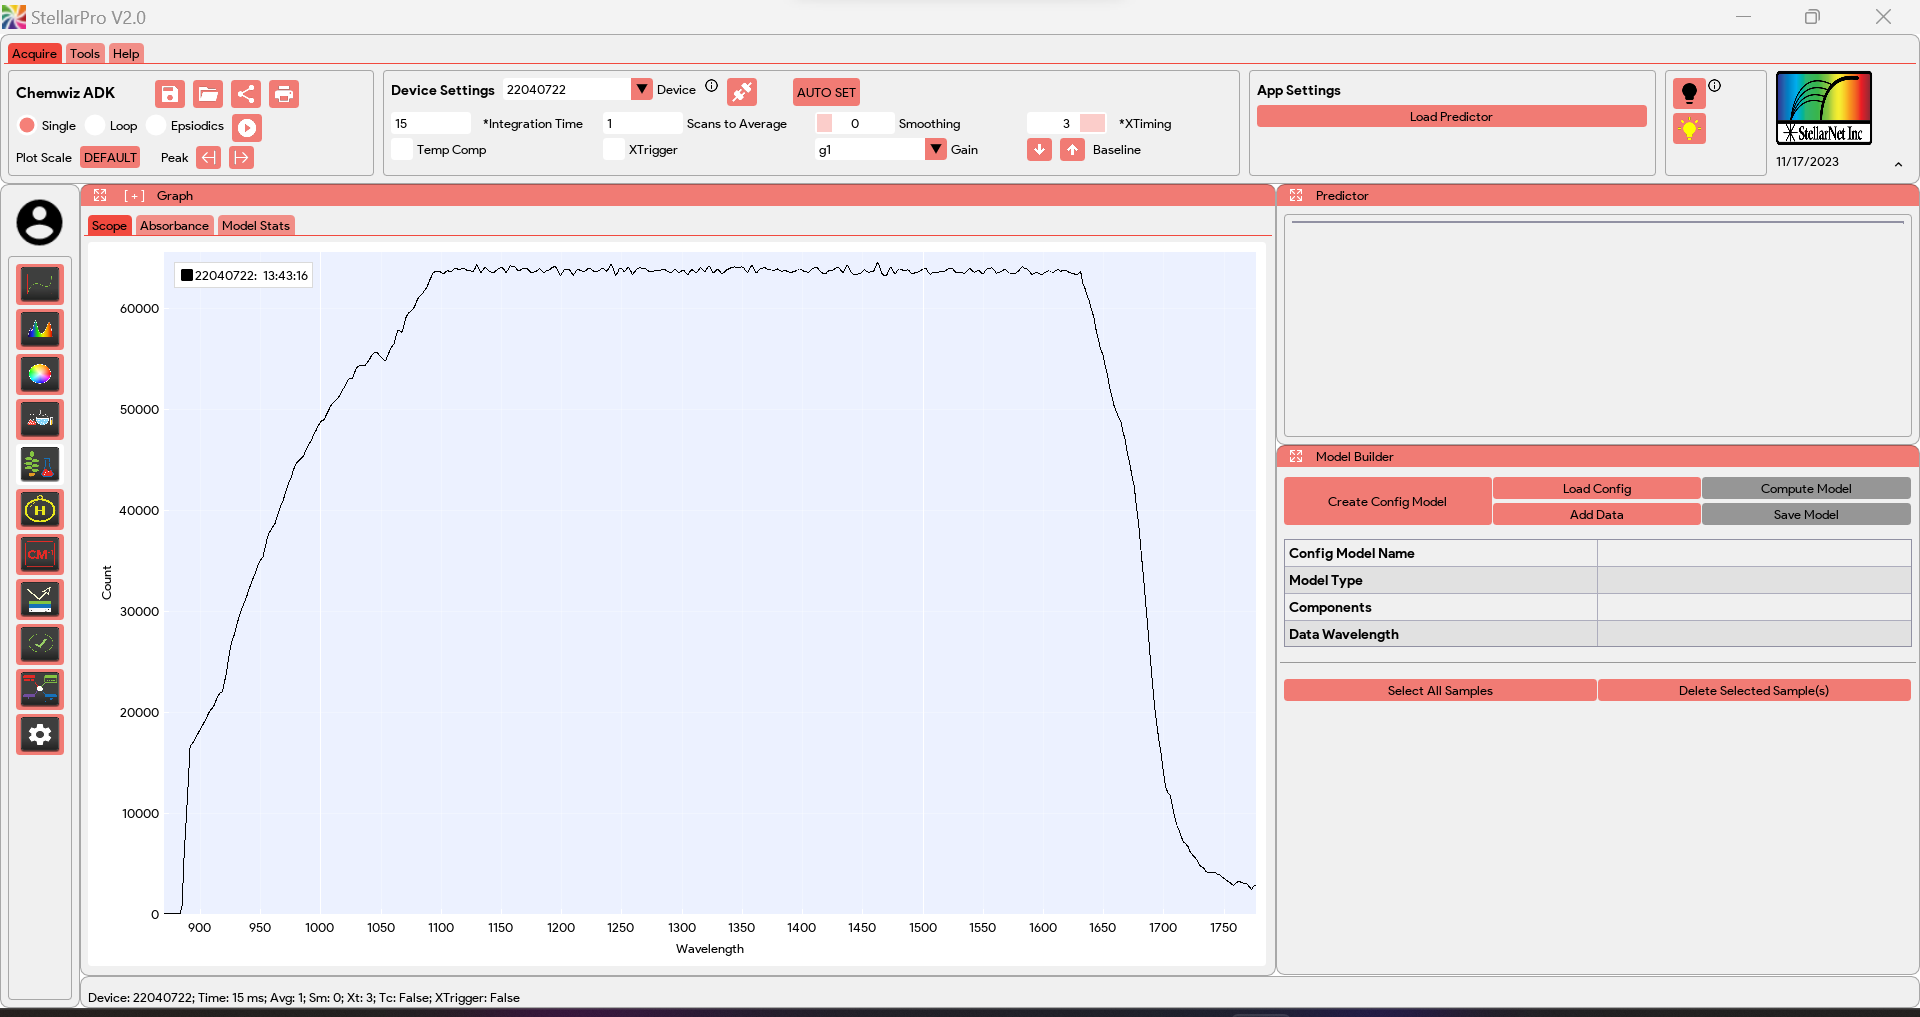
A similar curve below should appear in the SCOPE graph. 
If the curve is flat at the top, like the one below – decrease your integration time.
If the curve is below 55,000 counts – increase the integration time
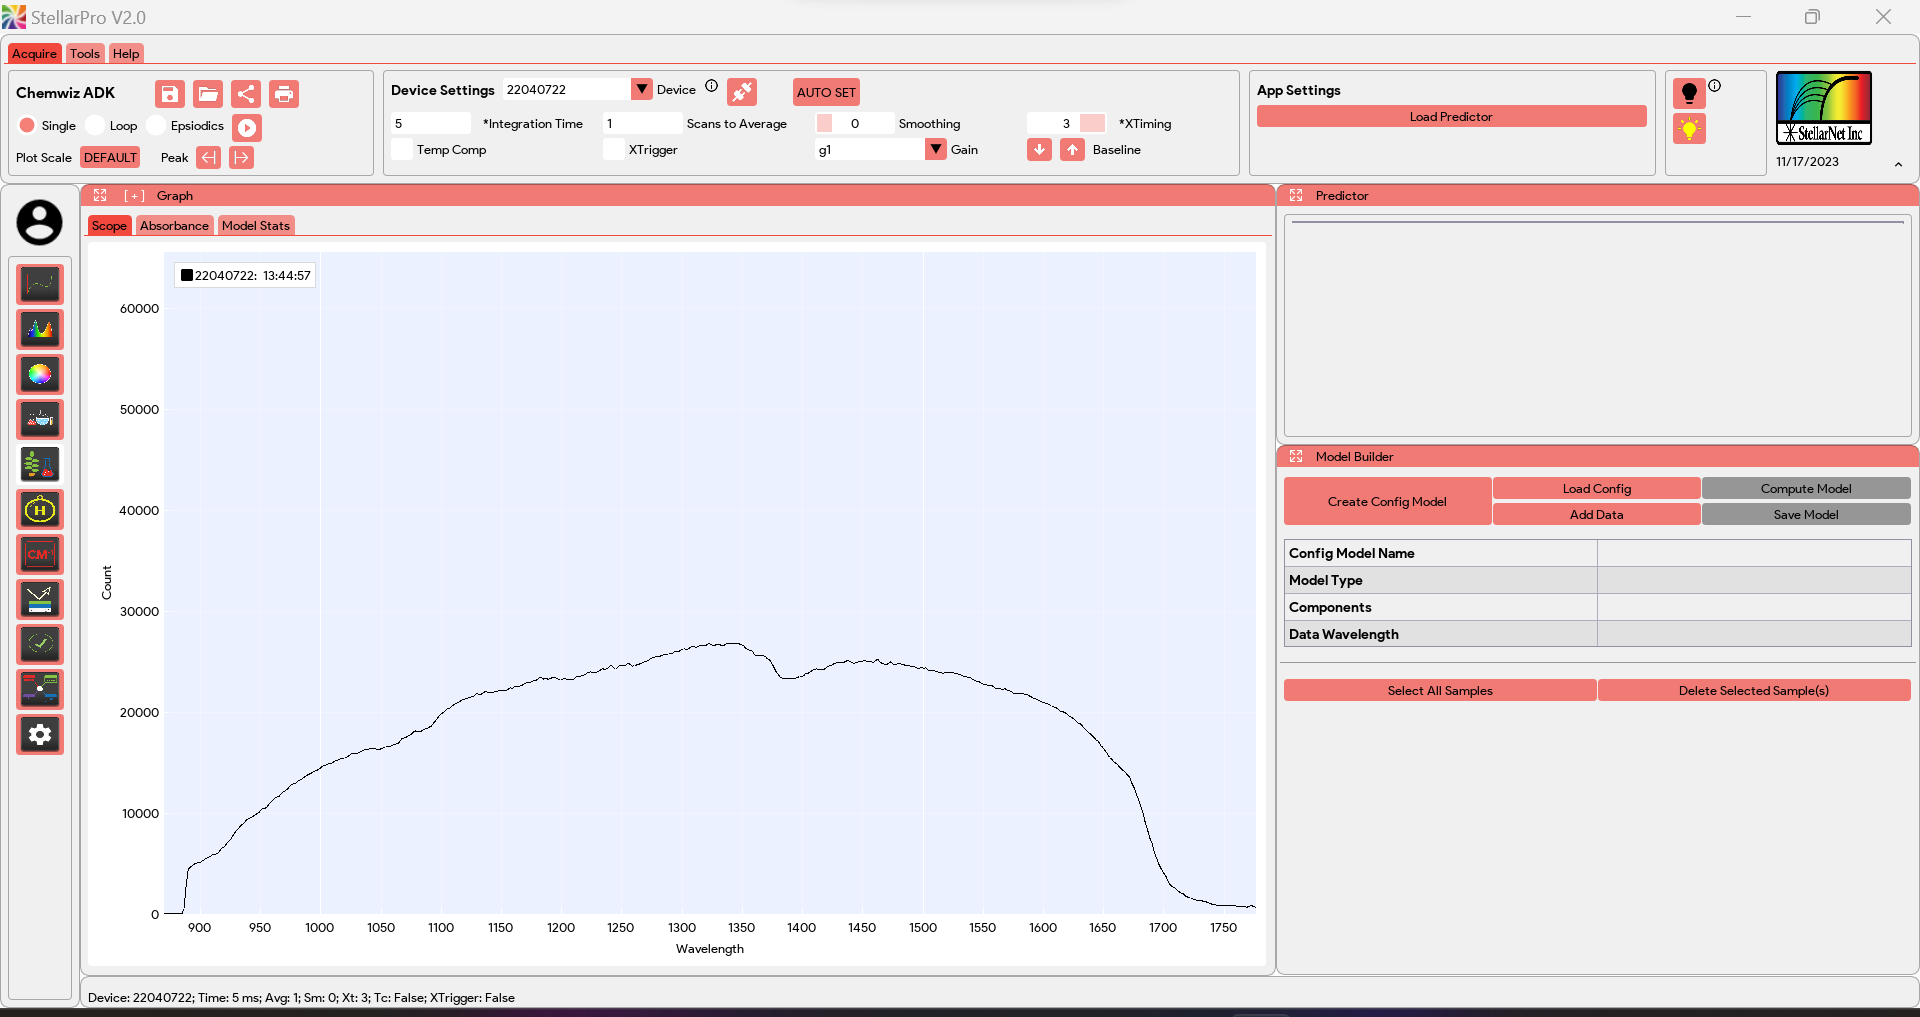
For the best results it is important to make sure enough light is being collected by the detector.
- Turn the lamp OFF, keeping the RS50 standard in place. Click ‘Capture’. The spectrum should drop to be right above the baseline.

- Left-click on the ‘Dark Reference‘ button,
 or
or  , located at the top right of the toolbar to capture the dark reference. The spectrum should now appear flat across the baseline:
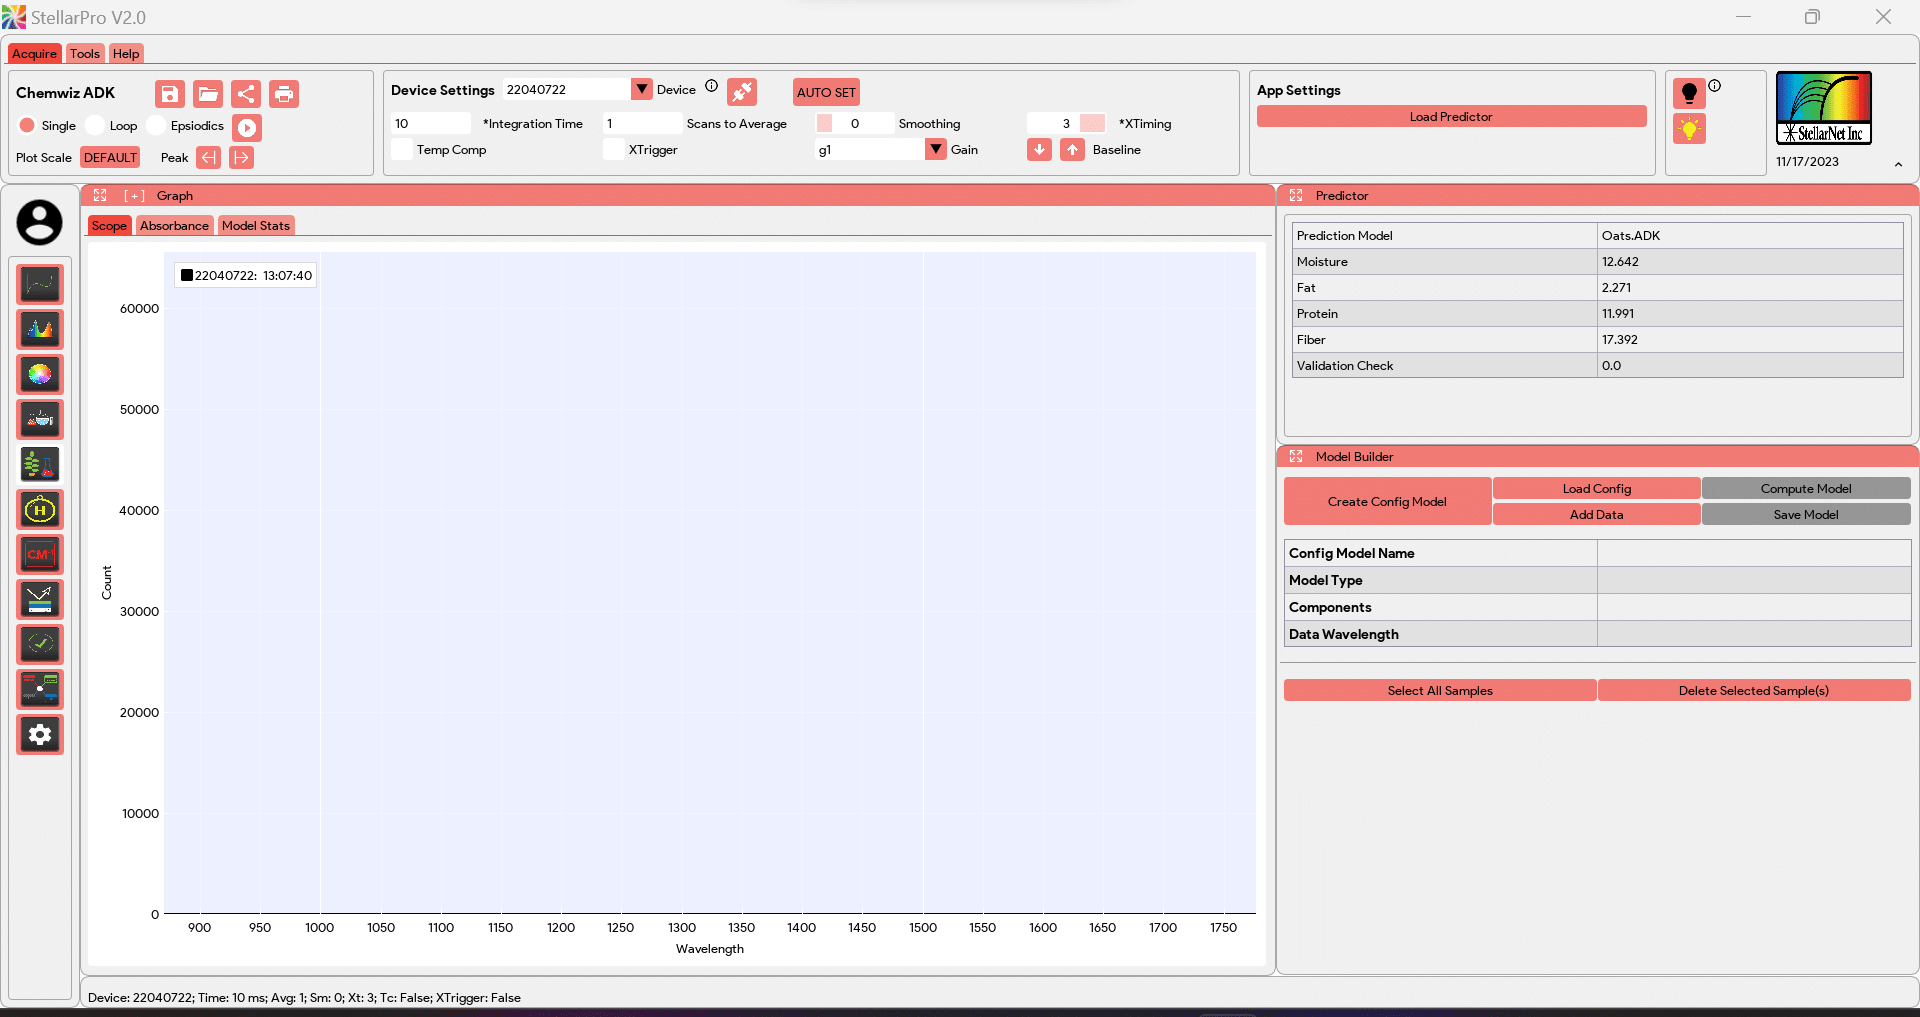
- Turn the lamp back ON and let it stabilize. The RS50 standard should still be in place. Click on the ‘Reference‘ button
 to take a reference measurement .
 - The system is now ready to measure samples!
- Replace the RS50 standard with sample for your measurement.
- If you have a .ADK predictor model created, load the appropriate predictor file by clicking on the ‘Load Predictor‘ button and choosing the correct .ADK (PLS) / .ADKc (Classification) predictor file.

- With the sample in place, click the ‘Capture’ button
- The spectrum and predictor panel will update – the predictor panel provides the compositional values based off of the loaded model and spectrum of current sample
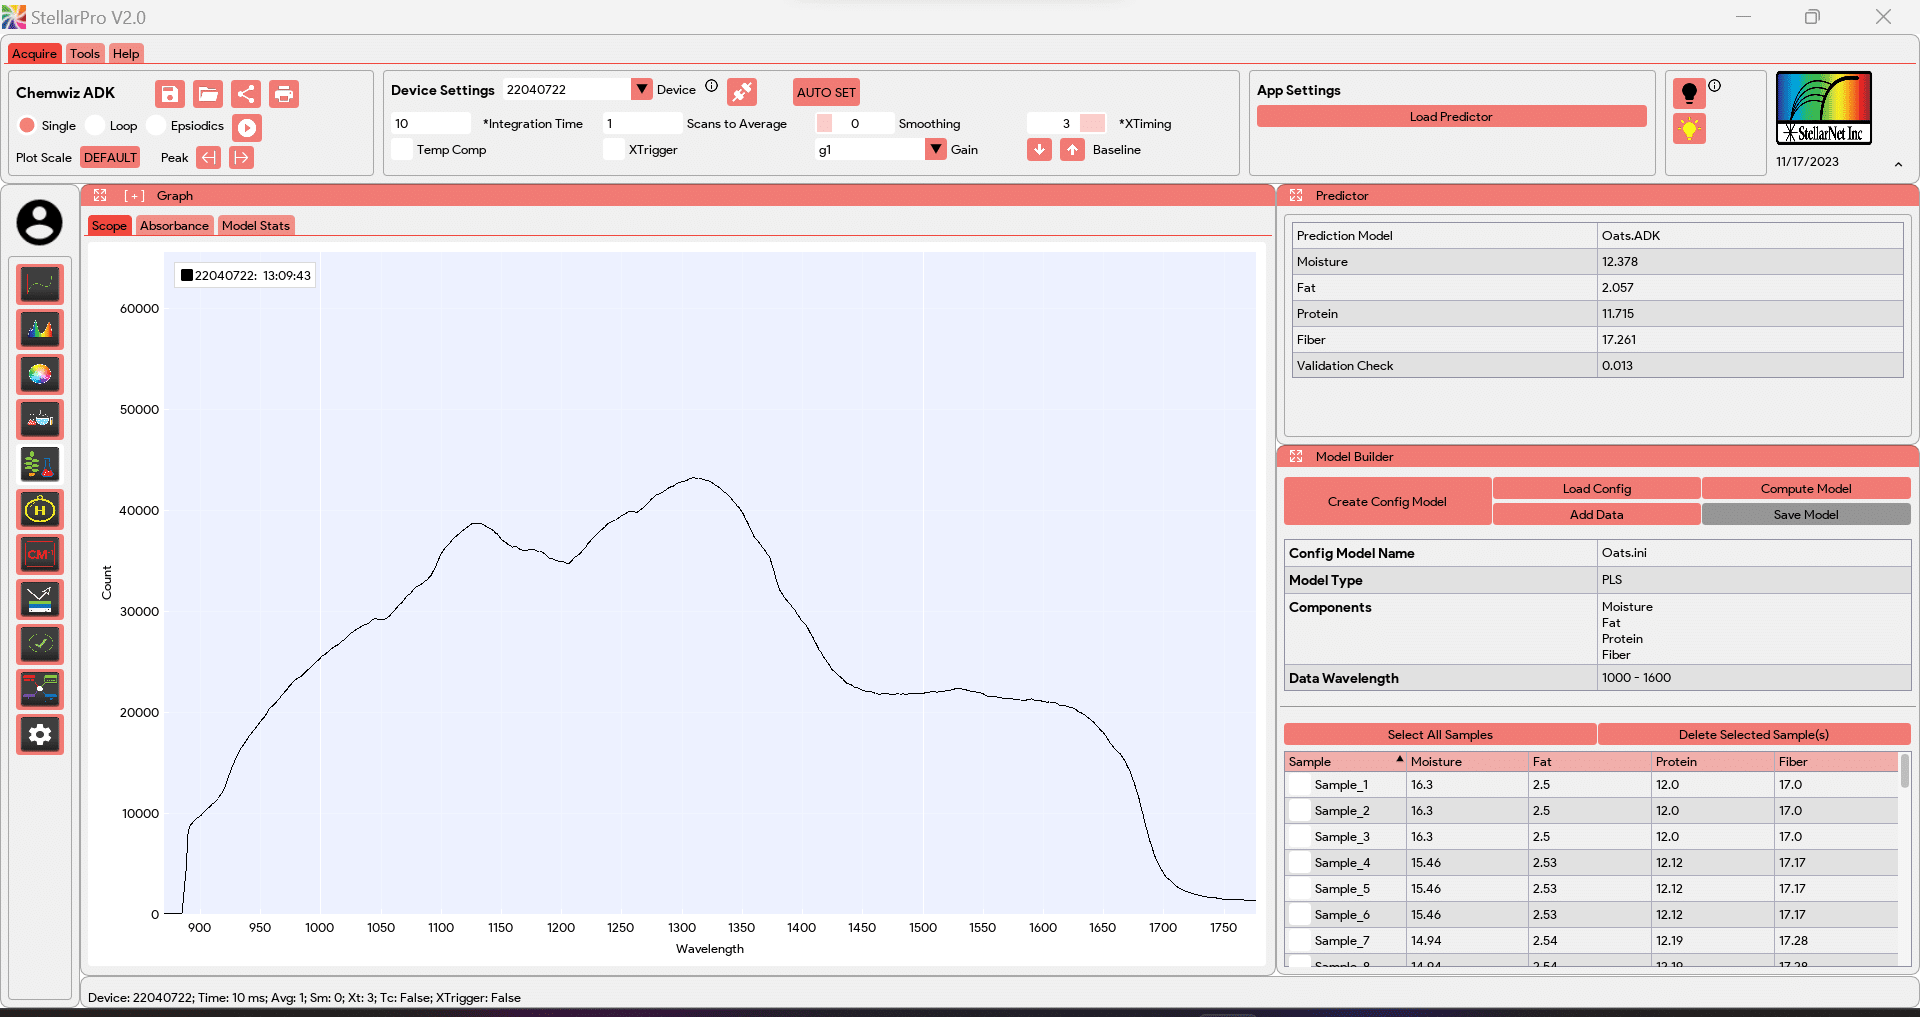
- If you don’t have a .ADK predictor file, please follow the ‘Creating a Predictor Procedure’ below to build your own predictor!
NOTE: Steps 5 to 9 is recommend to be perform every 45 minutes to update the dark and light reference.
Creating a Predictor Procedure
- Within the Model Builder window, users can access various functionalities and settings to build their models.
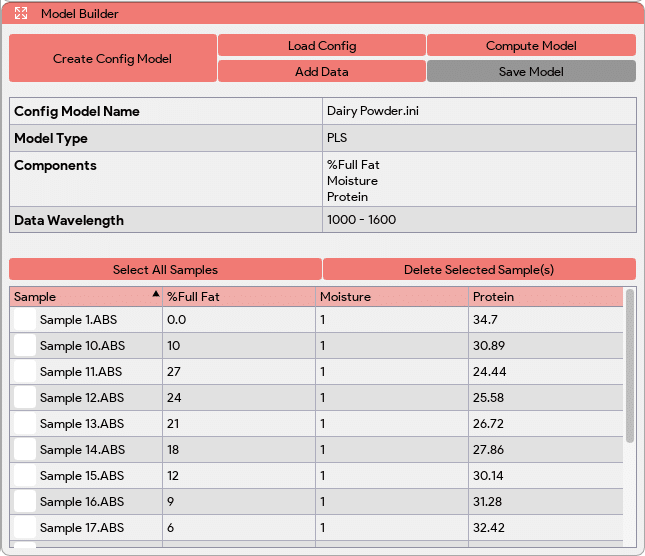
- Click on the ‘Create Config Model‘ button
 in the Model Builder window and a Configure Model window will shows up to allow the user to configure the model. Please fill out this window to create the desired model.
PLS for predicting component values 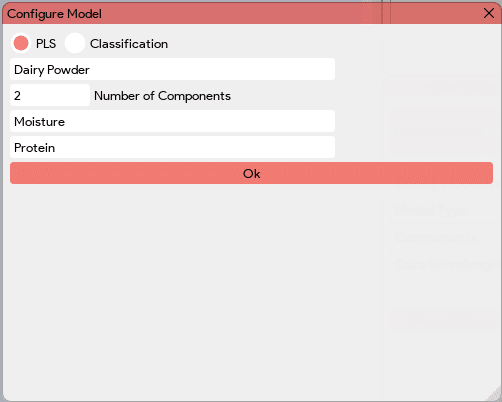
Enter the number of components that you want to predict, followed by inputting the component names.
Classification for categorizing samples 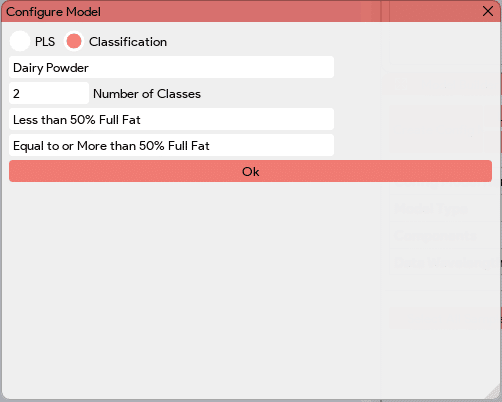
Enter the number of classes that your model will have, followed by inputting the class names.
- Once the configuration file is created, a folder named <configuration file name> will be created in the ‘Desktop -> StellarPro Data -> ChemWiz ADK’ directory. Inside that folder, a <configuration file name>.ini file will be generated containing essential information about the model.
- Click on the ‘Load Config‘ button
 and select the recently created <configuration file name>.ini configuration file. Now, we are ready to add the data!
 - Ensure steps 5 to 9 in the ‘Taking a Measurement Procedure’ are performed every 45 minutes to update the dark and reference.
- Place the sample, and click on the ‘Capture‘ button to capture the sample spectrum.
- Click on the ‘Add Data‘ button
 to add the latest absorbance reading into the data table for the model building. In the prompted window, input the known value for the corresponding components (for PLS) or class label (for Classification) associated with the absorbance reading.
PLS 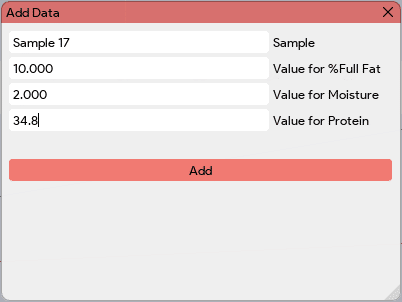
Classification 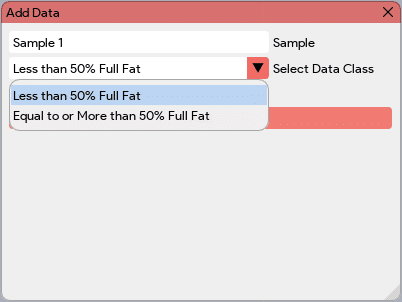
- Repeat steps 6 and 7 to add ALL the known samples to the data table.
- Once all known samples are added, we are ready to compute the model! Ensure to check/select ALL the samples that you want to include to train the model in the data table. Unchecked samples will not be used to train the model.
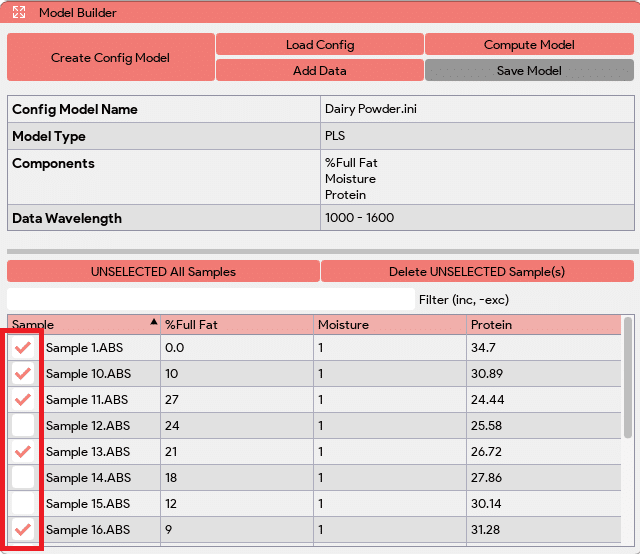
- Click on the ‘Compute Model’ button
 to build the model. This button will triggers a window where users can select various preprocessing steps for data cleaning, augmentation, and feature enhancement. You can also click on the ‘Post-Processing View’ button to visualize the data after the applied steps.
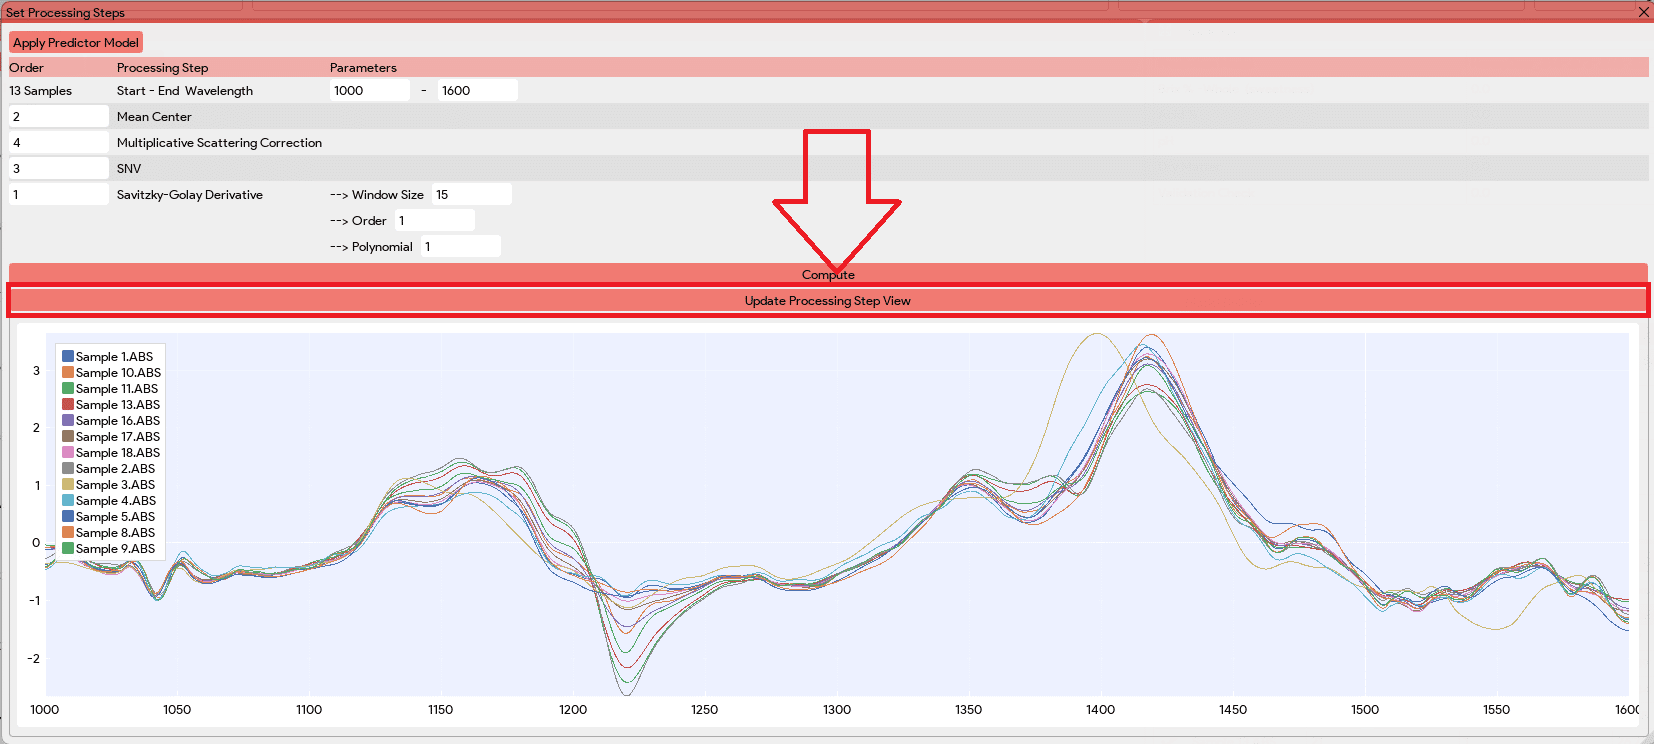
- After selecting the desired processing steps, click on ‘Compute‘ to apply the selected preprocessing steps to the data and create a model based on the configuration specified earlier.
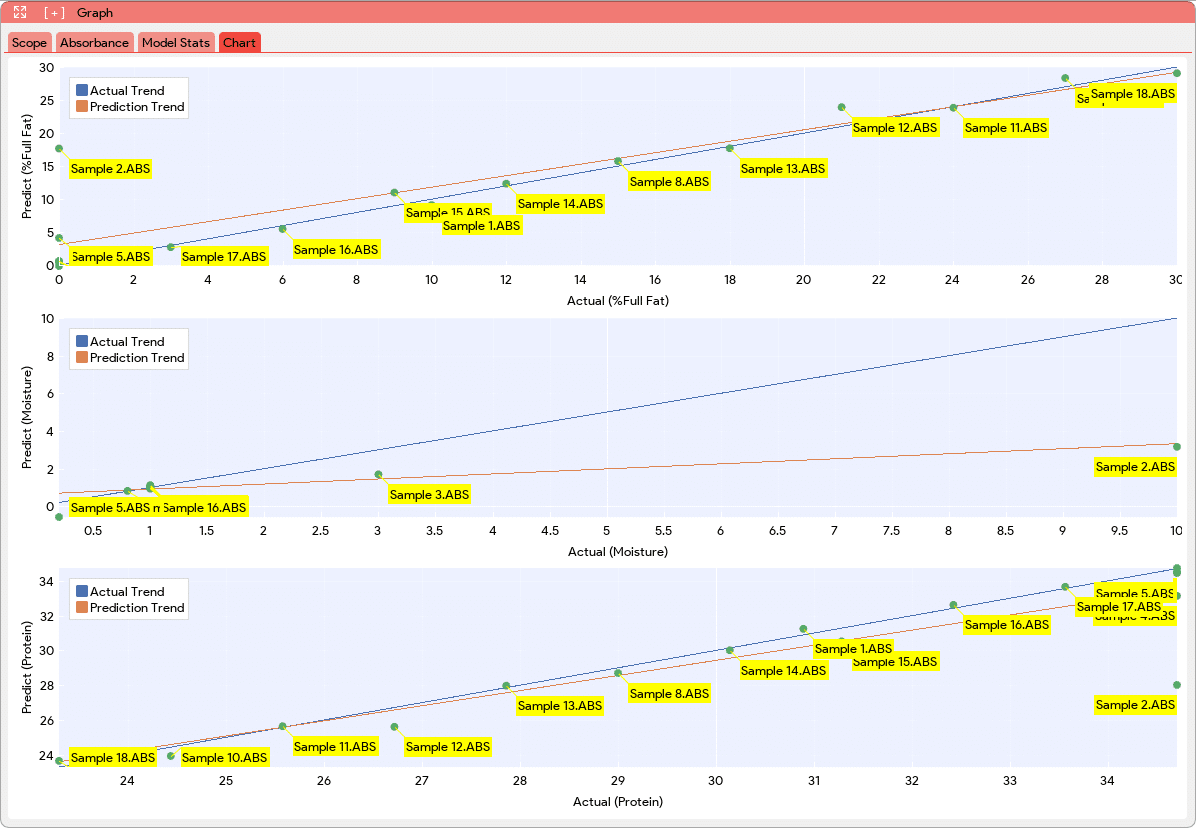
- Depending on the data size in the model builder, this process may take several seconds. After the model is created, you will see two new tabs added to the Graph window: “Model Stats” and “Chart“. Both are related to the performance and predictive capabilities of the model, allowing users to evaluate and assess its effectiveness.
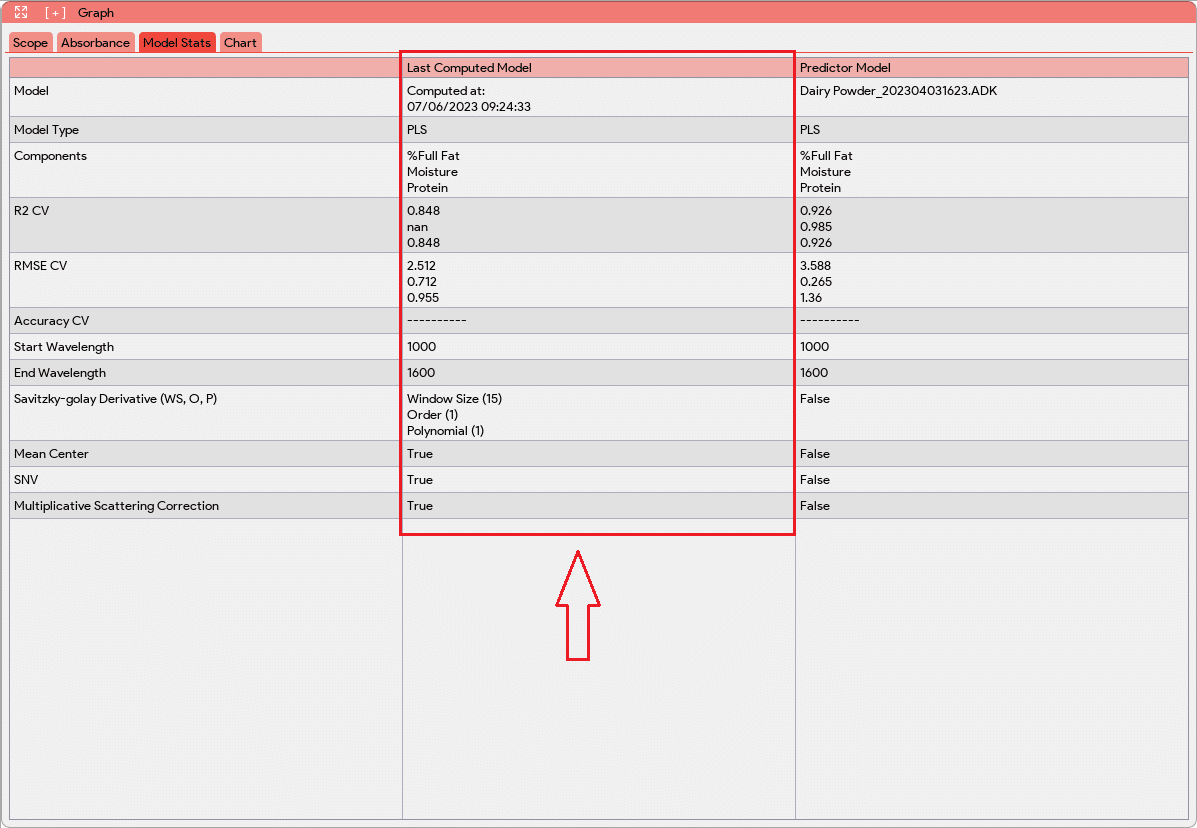
PLS
Classification 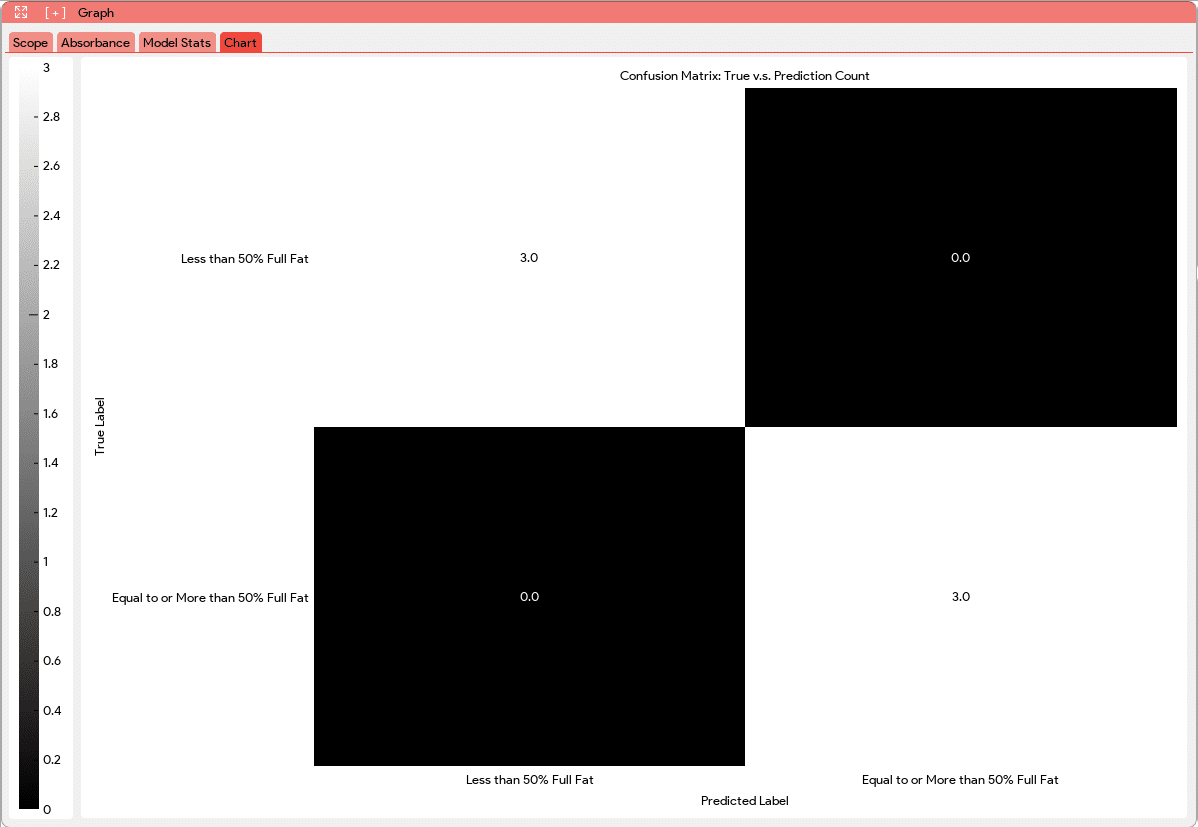
- Notes and Tips: Depending on the sample types, certain processing steps can significantly improve the model. Therefore, it is recommended to repeat steps 9 and 10 with different processing steps. Additionally, some samples might appear as outliers. In such cases, unchecking/unselecting the possible outlier sample(s) in the data table and then recomputing the model might result in a better model.
- After computing the desired predictor model, click on the ‘Save Model‘ button
 in the model builder window. A file browser will then prompt the user to select the store location and enter the predictor name for saving.
 - It’s time to make the prediction! Load the appropriate predictor file by clicking on the ‘Load Predictor‘ button and choosing the correct .ADK (PLS) / .ADKc (Classification) predictor file.

- Ensure the dark and reference are captured within 45 minutes. If not, follow steps 5 to 9 in the ‘Taking a Measurement Procedure‘ above to update the dark and reference.
- With the sample in place, click the ‘Capture’ button.
- The spectrum and predictor panel will update – the predictor panel provides the compositional values based off of the loaded model and spectrum of current sample!

- Repeat steps 17 and 18 to predict other unknown samples!
For additional information on StellarPro – visit StellarPro Software Knowledge Base.
